My sister-in-law Audree has a quilted birthday calendar that has the names of everyone in her family (and mine) and their birthdays. It's super cute, and I've wanted one for years. I thought it would also be a good idea for a Christmas present for my brother Jason and his family. I looked online trying to find a template for it, because Audree kept forgetting to tell me how to make one like hers, but I couldn't find anything. Instead, I found wooden Birthday signs. I chose one I liked the best and sort of adapted it to fit my skill level.
I went to Joann's to buy my supplies. Here's what I used:
* an unpainted wooden sign approximately 24" long and wide enough for my purposes
* wood lettering that said "Celebrate"
* letter stencils
* thin wood circles that were big enough to fit a name and number on them - unpainted
* eyelets and hooks
* paint
* hot glue gun
I chose red, brown, and cream for the color scheme and painted the sign tan. I painted enough wood circles for all the names on Jason's side of the family and extras so Rachel could write the names of the people on her side of the family. I had thought about asking her for this info but thought it would kind of kill the surprise.
Because I couldn't find vinyl letters that fit my wood sign, so I had to improvise a little. I found the word "Celebrate" in wood that fit and that was unpainted, so I decided to use that as the title. I used letter stencils to paint on the first letter of each month. I found a bag of wood circles with different sizes. I used the medium size for the names and birthdays and used a few of the smaller ones to decorate the sign.
The eyelets and hooks ended up being trickier than they should have been. We went to several hardware stores and could only find eyelets, not hooks. So, we bought lots of eyelets and Steve cut half of them to create hooks. Next time I make a sign, I'll try to find hooks online. Also, the wood circles I bought weren't thick enough to screw the hooks and eyelets into, so I glued them on the back of the circles using my brand new hot glue gun. The trick was to use enough glue but not enough.
The next time I make a sign, I will remember to sand all the wood products. They seemed fairly smooth until I started painting them, then I could tell how rough they were. I tried to sand them after painting a coat, but it wasn't the same. Fortunately, the finished product looks pretty good despite not sanding.
All in all, it took me about a week of sporadic work to make the sign. Jason and Rachel like it, which makes me very happy. I hope to make a couple more signs for other people, and one for myself. :)
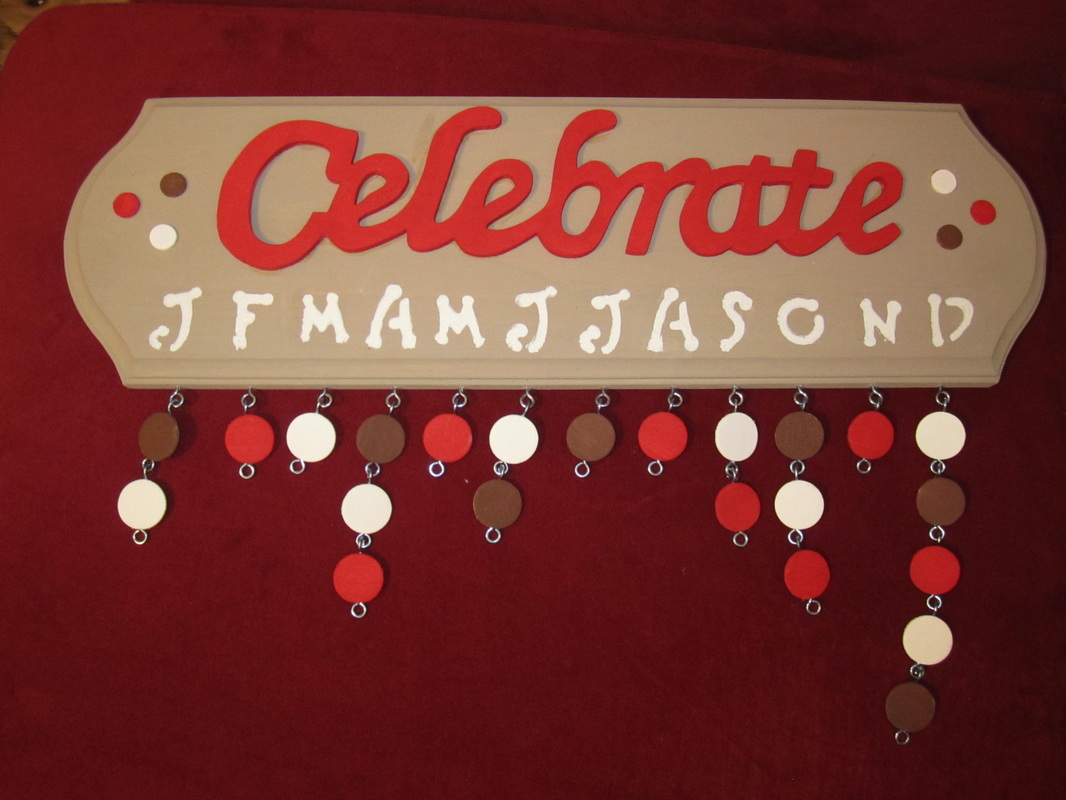
This is the sign before I wrote the names and dates on them.
I finished this sign December 2013.
 RSS Feed